


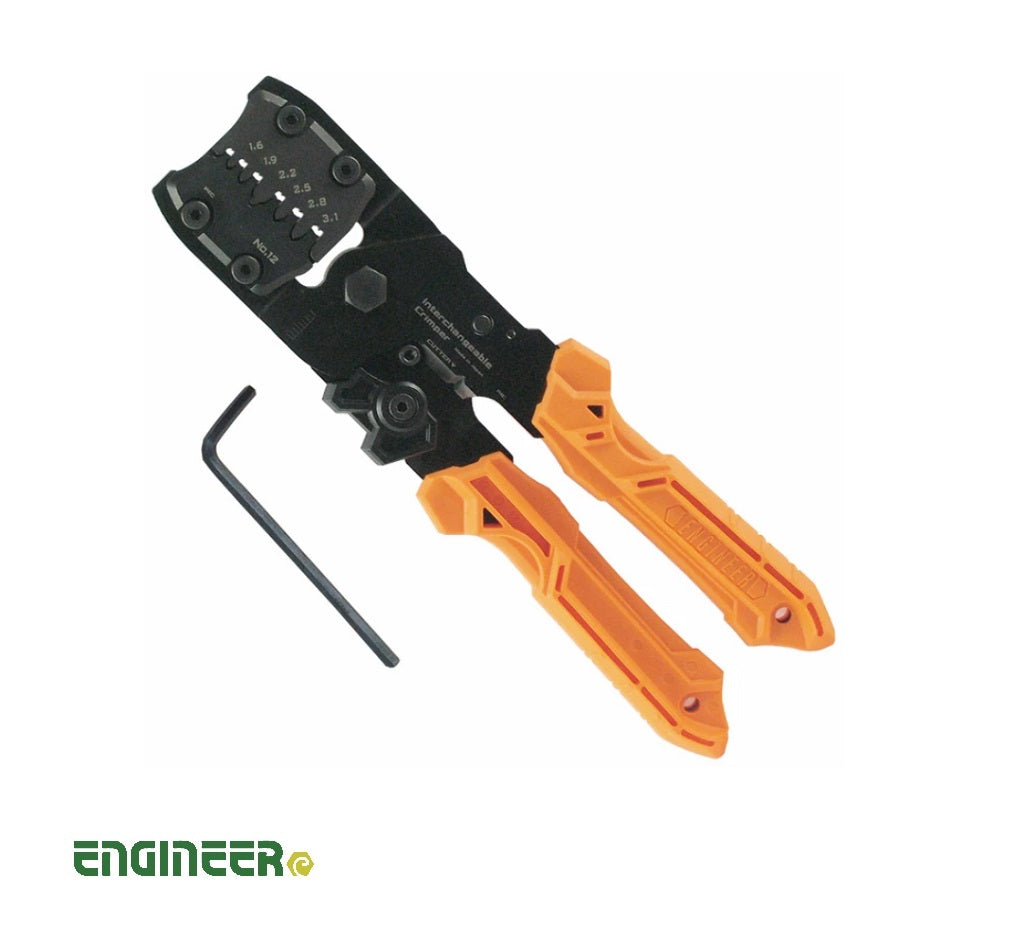


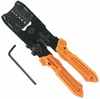
ENGINEER PAD12 Handy Crimp Tool Ultra-precise crimper forming excellent crimping finish
- Product SKU: IRCPEN-PAD12
- Category: Commercial, DIY Tools & Gadgets, E&E Products & Tools, Engineer Tools
 Enquiry Now
- Interchangeable die set for open-barrel contacts.
- Easy replacement and perfect fitting to frame
- Ergonomically-designed handles with strap hole
- Equipped with wire stripper and cutter
- 2.5mm (Across flats) Hex key wrench included as standard accessory
Features

Precise crimping and excellent curling of conductor barrel and insulation barrel individually.

Wire cutter with stripping hole

Easy fitting to frame. No need to adjust positioning. (PATENT)

Fix an interchangeable die set. Squeeze handles to close up jaws. While gripping handles, fasten 4 pcs. of the cap screws securely.
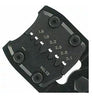
PAD-12

M-Size: Over 110 different terminals applicable

How to adjust the joint-Screw

(1) When Joint-Screw gets loose, stripping work becomes dull.

(2) Hold the hex bolt (Reverse side) with a wrench.

(3) Fasten the joint-screw with a hex key wrench. (Torque less than 2 N/m)

=CAUTION=
Do not attempt to adjust the bolt with nut from both sides with 2 pcs. of wrenches, which causes the screw joint broken. Use a hex key wrench for fastening with torque of less than 2 N/m.
How to select the suitable crimping dies
-
Before use, please make sure that wire size meets the standard provided by each connector maker and that the configuration and size of terminal is adaptable to the crimping dies.
-
Adjust both wings (lugs) of open-barrel to be in parallel before crimping.
-
Make sure that the crimp contact retains straight before insertion into a die cavity.
-
Do not lay the crimp contact inclined in a die cavity to avoid deforming in crimping work.
-
Do not squeeze handles so hard while crimping the insulation portion, which may cause disconnection of wires.


2. Select the die width that is close to the width of barrel lugs measured.
Example: 1.5mm measured -->> Select 1.6mm dies.
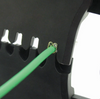
3. Conductor Barrel (Lug) Crimping :
Align the rear edge of conductor barrel with the chamfered edge of the upper die to form a bellmouth on the edge of the crimped barrel.
(as per the figure on the right)
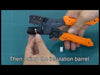
Insulation Barrel (Lug) Crimping :
Set the insulation barrel (lug) at the center of the upper die in depth to keep the barrel (lug) horizontal when crimping.
.webp)
Specifications


- Interchangeable die set for open-barrel contacts.
- Easy replacement and perfect fitting to frame
- Ergonomically-designed handles with strap hole
- Equipped with wire stripper and cutter
- 2.5mm (Across flats) Hex key wrench included as standard accessory
Features
Precise crimping and excellent curling of conductor barrel and insulation barrel individually.
Wire cutter with stripping hole
Easy fitting to frame. No need to adjust positioning. (PATENT)
Fix an interchangeable die set. Squeeze handles to close up jaws. While gripping handles, fasten 4 pcs. of the cap screws securely.
PAD-12
M-Size: Over 110 different terminals applicable
How to adjust the joint-Screw
(1) When Joint-Screw gets loose, stripping work becomes dull.
(2) Hold the hex bolt (Reverse side) with a wrench.
(3) Fasten the joint-screw with a hex key wrench. (Torque less than 2 N/m)
=CAUTION=
Do not attempt to adjust the bolt with nut from both sides with 2 pcs. of wrenches, which causes the screw joint broken. Use a hex key wrench for fastening with torque of less than 2 N/m.
How to select the suitable crimping dies
-
Before use, please make sure that wire size meets the standard provided by each connector maker and that the configuration and size of terminal is adaptable to the crimping dies.
-
Adjust both wings (lugs) of open-barrel to be in parallel before crimping.
-
Make sure that the crimp contact retains straight before insertion into a die cavity.
-
Do not lay the crimp contact inclined in a die cavity to avoid deforming in crimping work.
-
Do not squeeze handles so hard while crimping the insulation portion, which may cause disconnection of wires.
1. Measure the width of conductor barrel or insulation barrel with a caliper while both barrel wings are adjusted in parallel.
2. Select the die width that is close to the width of barrel lugs measured.
Example: 1.5mm measured -->> Select 1.6mm dies.
3. Conductor Barrel (Lug) Crimping :
Align the rear edge of conductor barrel with the chamfered edge of the upper die to form a bellmouth on the edge of the crimped barrel.
(as per the figure on the right)
Insulation Barrel (Lug) Crimping :
Set the insulation barrel (lug) at the center of the upper die in depth to keep the barrel (lug) horizontal when crimping.
Specifications


